Tools Needed: Phillips screwdriver, 12 mm wrenchWatch:
Step-By-Step Instructions:
STEP 1: Open the Main Housing on the Unit
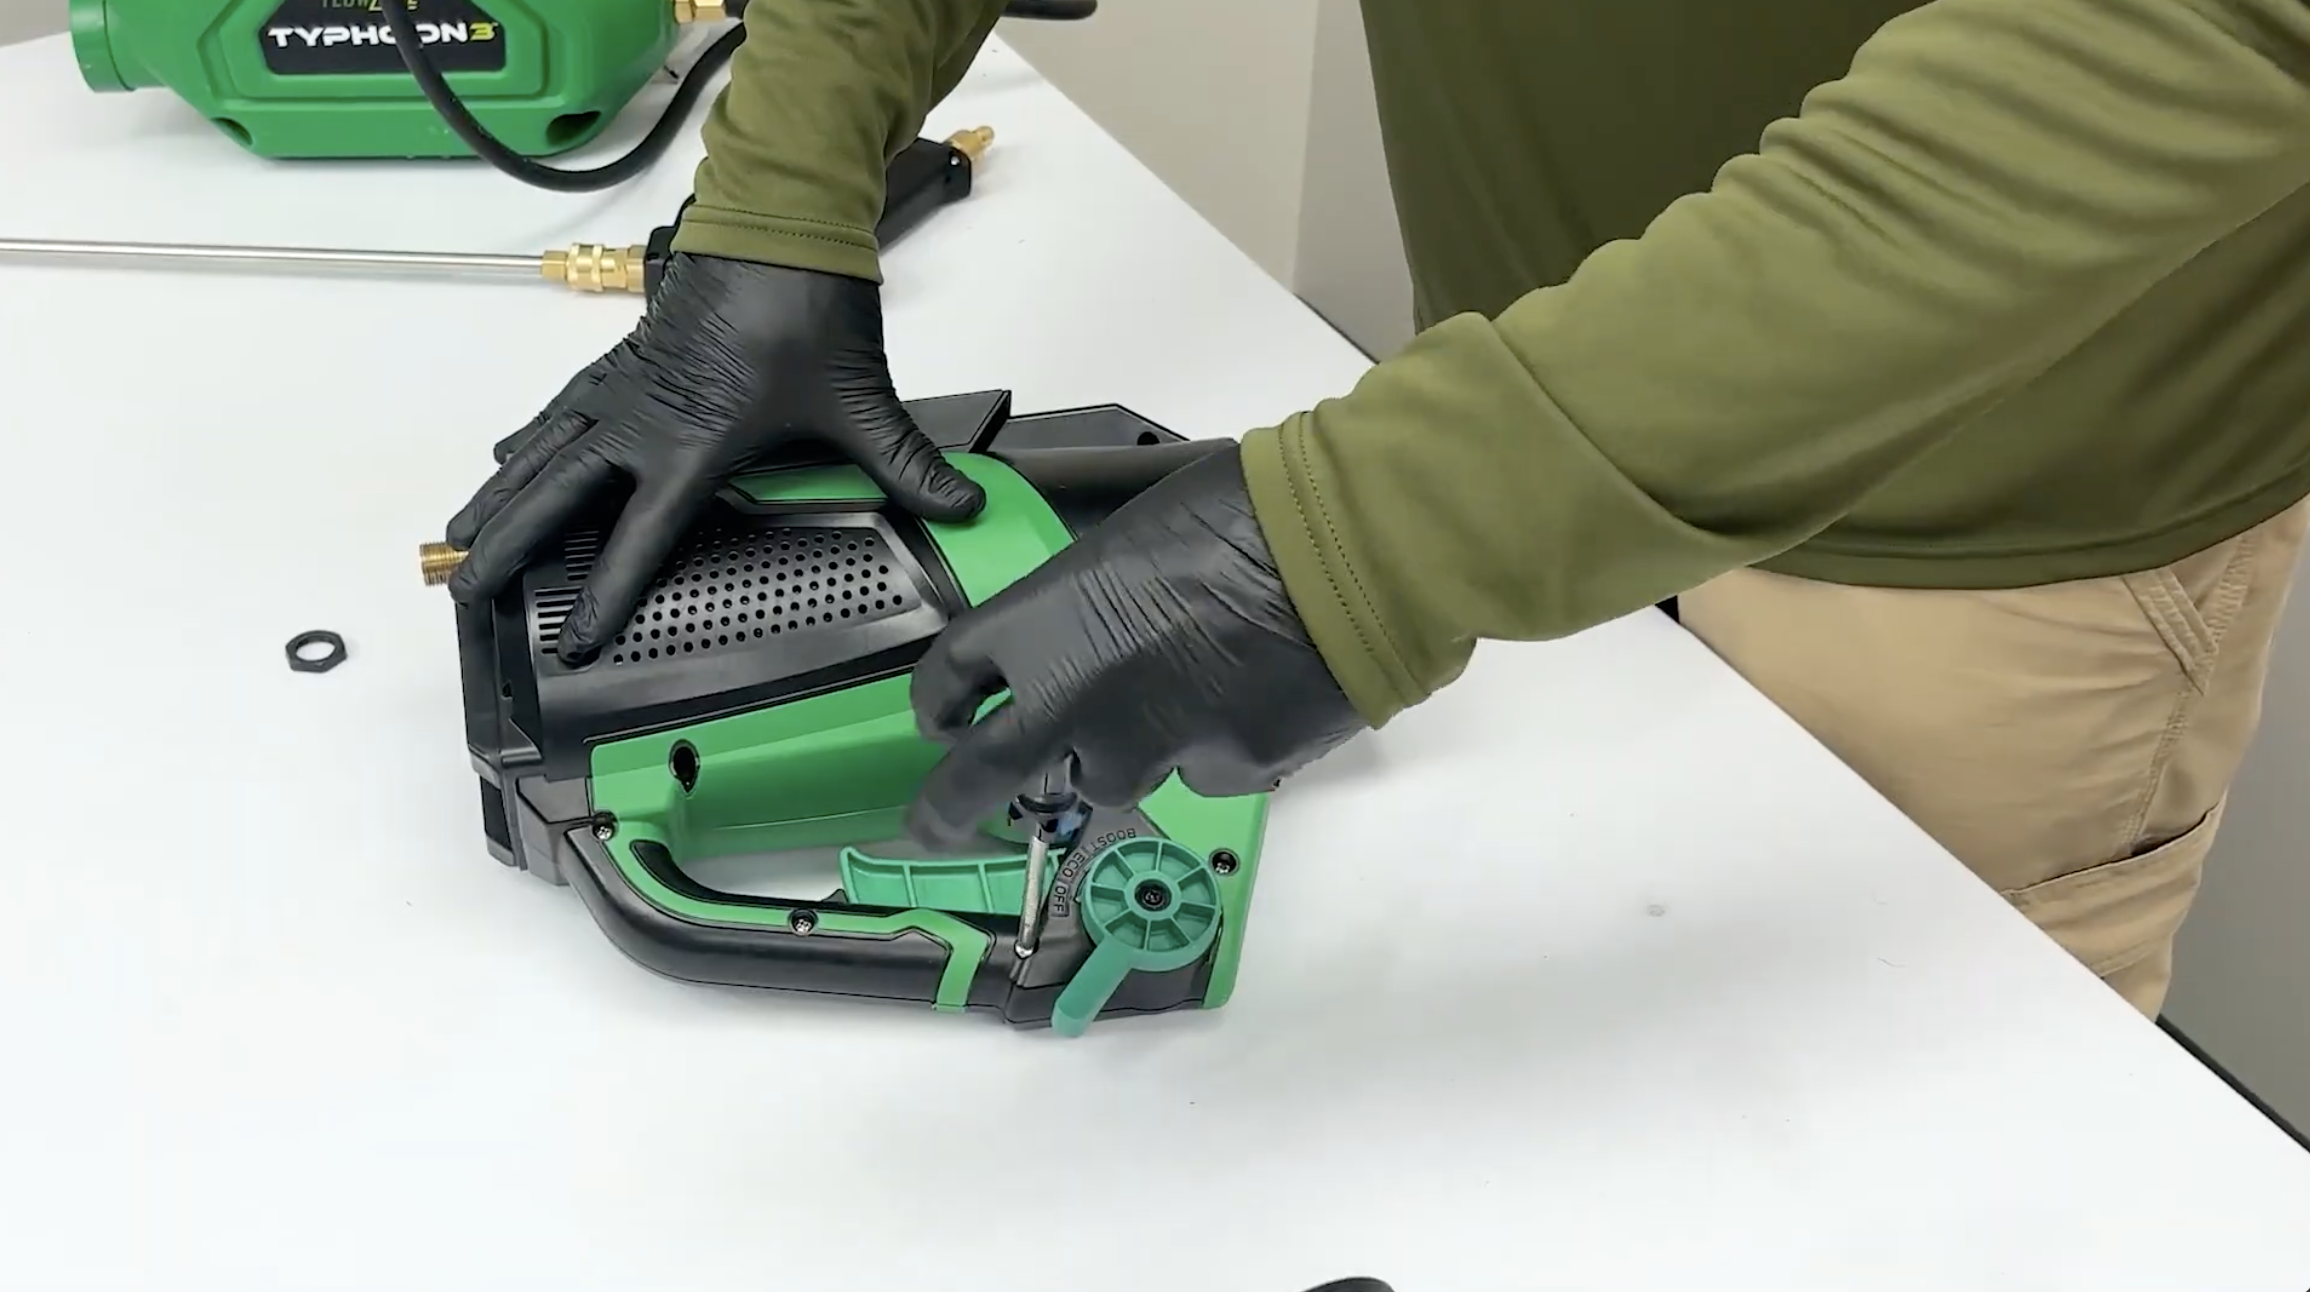
- To open the main housing, begin by removing the front duct assembly.
- Remove the 15 screws holding the main housing together. Unscrew the nut around the exterior hose connection.
- Separate the right & left cover plates to expose the inside of the unit.
Note: There are 2 screws under the bottom plate and 4 located on the battery holster.STEP 2: Remove the Trigger and Valve Assembly from the Unit
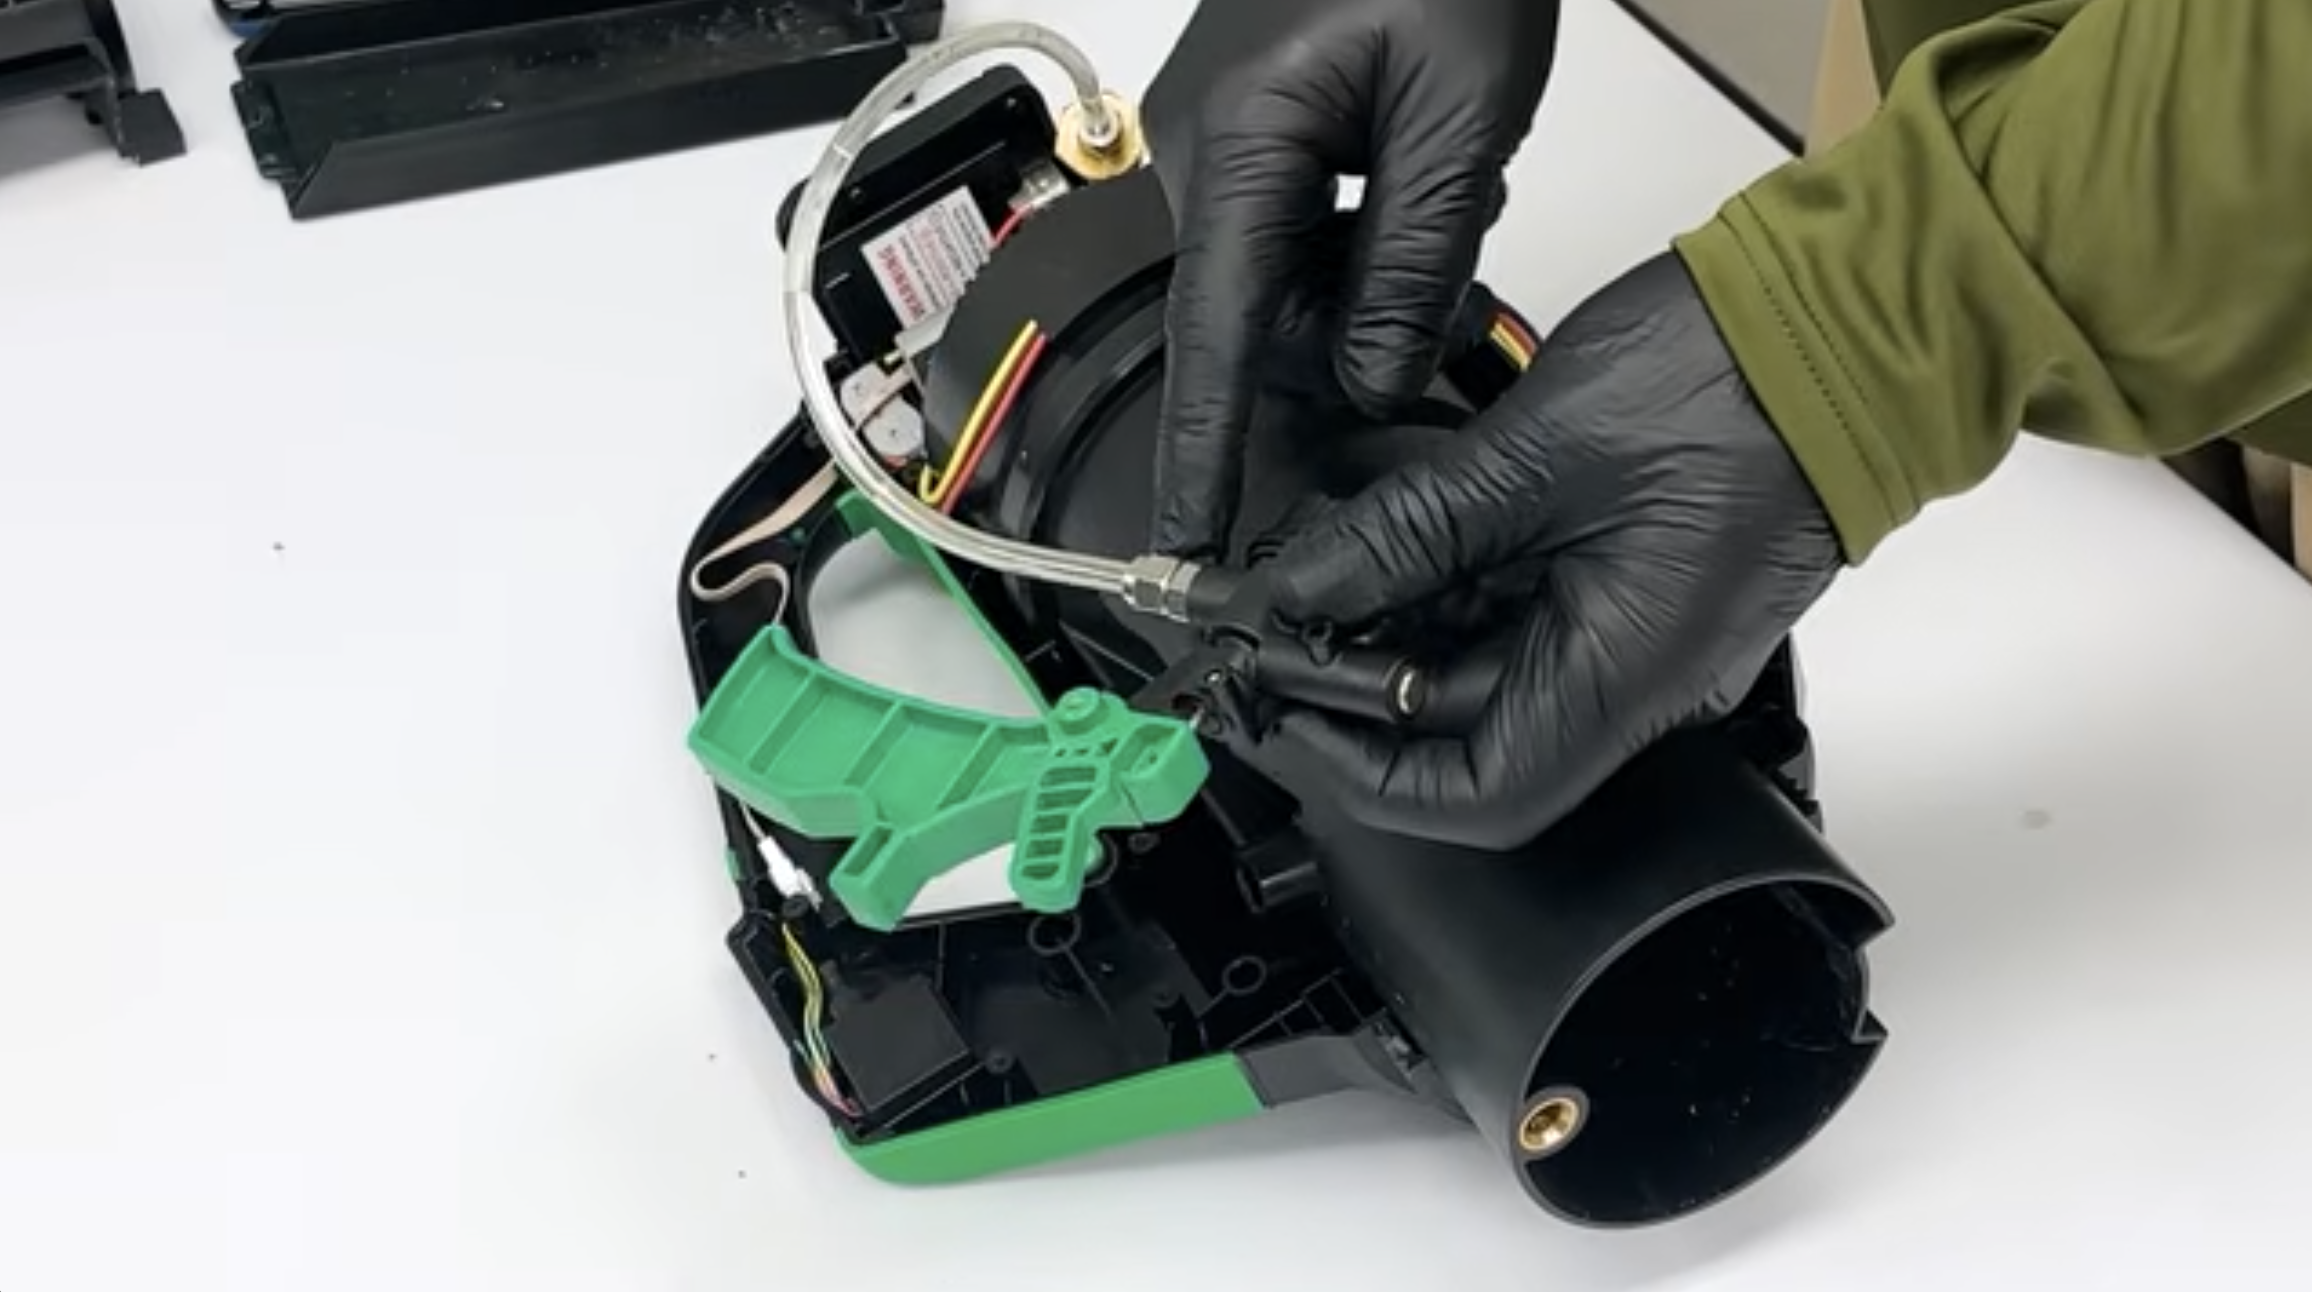
- Slide your finger under the trigger to free it from the main housing.
- Detach the trigger assembly from the fan and motor.
- Use a wrench to disconnect the hose from the existing trigger assembly. Then, connect it to the replacement trigger assembly.
STEP 3: Insert and Attach the Replacement Trigger and Valve Assembly
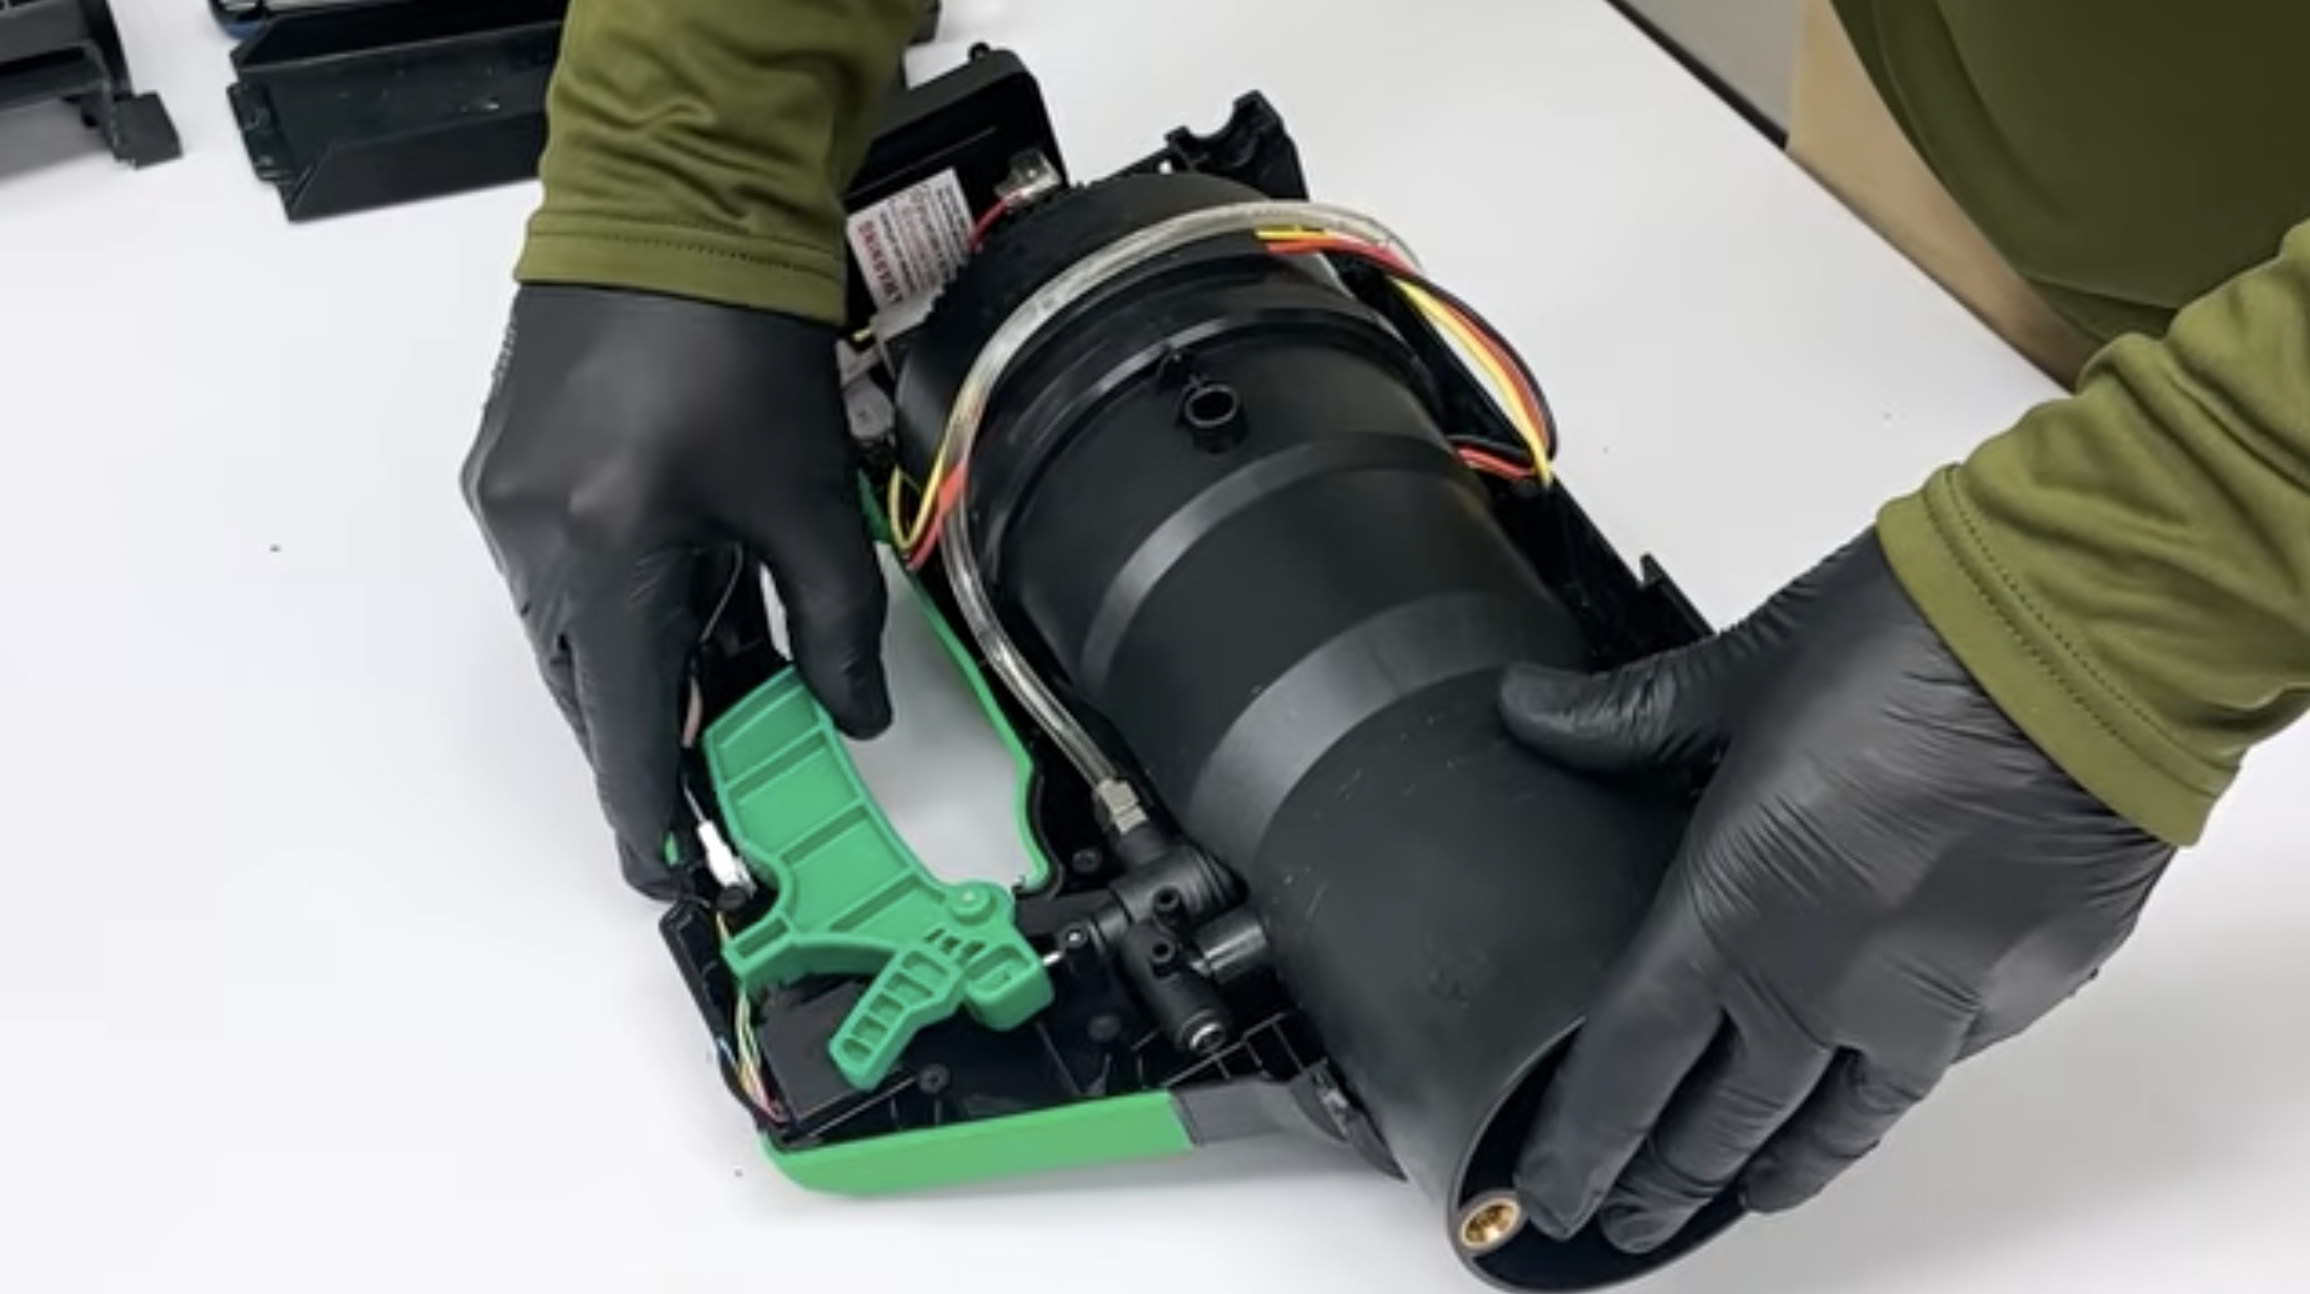
- Insert the replacement trigger assembly to the designated slot.
- Ensure the trigger handle is aligned with the top of the housing, and test that the trigger engages properly.
STEP 4: Secure the Main Housing Back onto the Unit
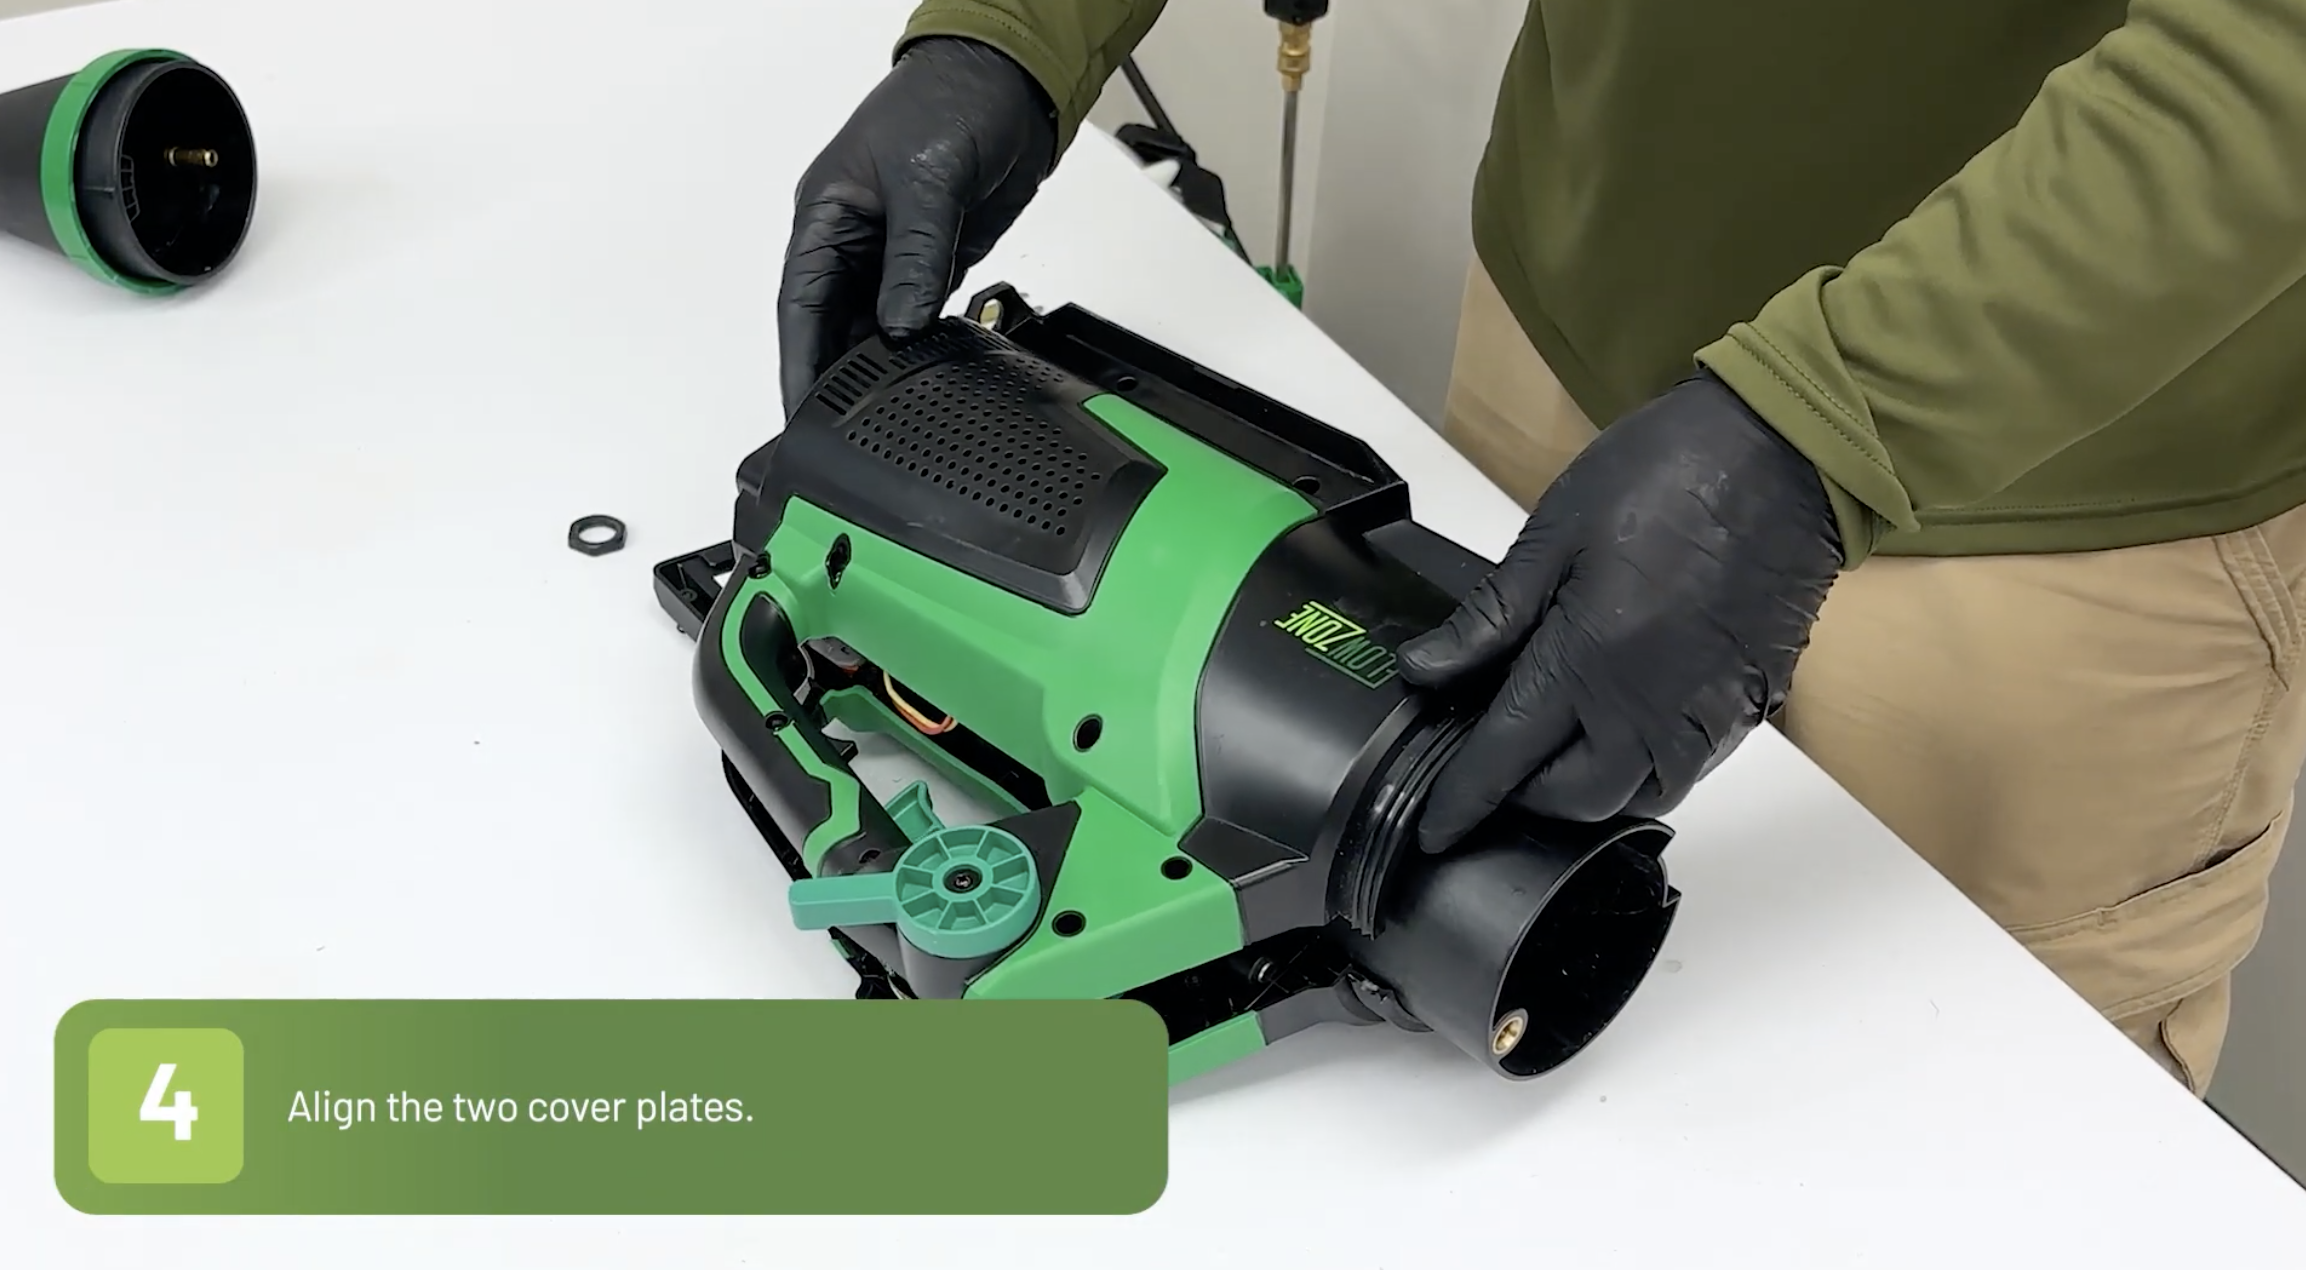
- Align the two cover plates
- Secure the 15 screws into the two cover plates
- Slide the bottom plate back onto the unit, and secure the lock nut onto the hose connection.
- Secure the QuickSwap™ Terminal to the cover plates.
- Reattach the front duct assembly.
Was this article helpful?
That’s Great!
Thank you for your feedback
Sorry! We couldn't be helpful
Thank you for your feedback
Feedback sent
We appreciate your effort and will try to fix the article